By Ludovic Brucker
We were on Greenland’s ice sheet for only a week, but despite the short deployment, we had to accomplish two main science objectives. The first was drilling two deep cores into the firn (aged snow) and ice (30- and 65-m deep, respectively), to insert temperature probes that will record temperature evolution at various depths. Secondly, we wanted to drill shallower cores (7 to 15 m) to record the snow’s density vertical profile using a neutron density probe – and this is what this post is going to be about: the shallow drilling that we did and the measurements we took in these holes to monitor the snow and ice layering and their properties.
To drill the shallower cores, we used the same solar-powered drill as in 2010 and 2011 in Antarctica during the Satellite Era Accumulation Traverse. It is composed of four parts, which I’ll describe from top to bottom. The first segment contains the motor to rotate the other parts. The second and third parts are barrels — one for the snow and ice chips, and the other to store the one-meter long drilled core. The fourth part, the cutters, is screwed into the latter barrel. Cutters are critical since they are the sharp elements that cut the snow, firn, and ice. Since snow and ice having different properties, the cutters for snow and ice are different. For instance, if we use the ice cutters at a smaller angle, we will drill at less depth during each barrel rotation. Where we drilled, part of the winter snow melts during the summer and when it refreezes, it forms a thick ice layer every year. The snow that did not melt will slowly evolve to firn, and, eventually, ice. Because of the different, we thus had to switch cutters during our drilling: otherwise, we would have not been able to drill through the past summer ice layers.
Jay drilled cores through the water contained within the firn (the aquifer). We used our smaller drill, since we did not want to enter in contact with the aquifer. Therefore, each of our cores was shallower than the water layer’s top and each was drilled in about an hour.
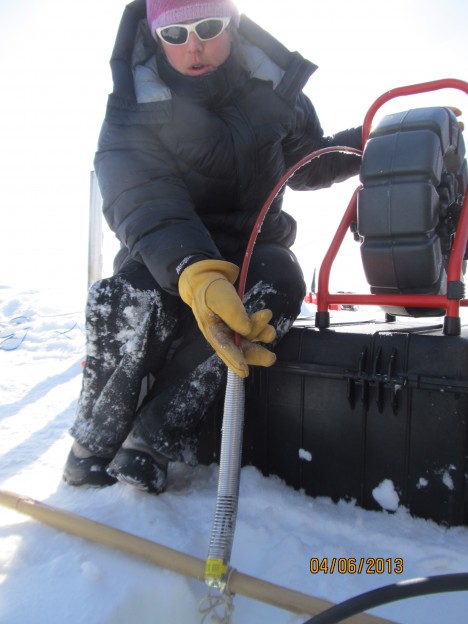
Once we had drilled the hole, we observed the layering of the snow and ice cover using a video camera. Thanks to the camera’s flashlight, we were able to identify the thick 2012 summer ice layer (about 3 m below the surface) that formed after a massive surface melt event, as well as the previous summer ice layers. Our team used this sensor to monitor a water-filled hole for the first time. We were all really excited to see the inner upper part of the ice sheet!

Lora holding the video camera that she will send down in the hole to monitor the snow and ice layering.
We also used this useful device to check the position of the temperature probes and to ensure that the entire line of temperature sensors was straight inside the hole. The first time we inserted the camera into the water in the hole, we were amazed to discover the amount of air bubbles released by the firn, which propagated toward the water/air interface. The aquifer is composed of ice, water, and air. These elements are present several meters below the surface, which means they’re under pressure. Once we drilled the cores, the pressurized air bubbles in the vicinity of the hole migrated toward the hole and then moved upwards to the water/air interface.
Our last scientific activity was to monitor density with 1-cm vertical resolution using the neutron density probe. We moved the probe along the borehole at a speed of about 5 cm per minute. This sounds like a time-consuming measurement, but measuring density manually is significantly more labor intensive since one must saw the core into segments and then measure each segment’s length, diameter, and weight.
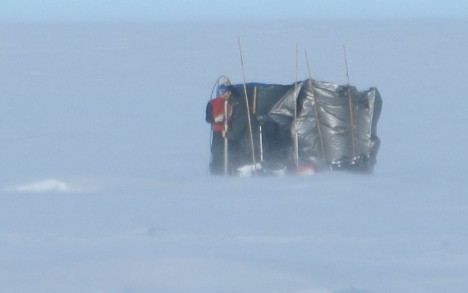
To be more comfortable during the drilling and while recording our scientific data, we always paid particular attention to staying behind our wind break.

Lora and Ludo drilling behind a windbreak during a windy day, with a lot of blowing snow near the ground.
A windbreak is composed of a simple plastic tarp supported by bamboo sticks and held by bungee cords. While we were in Kulusuk preparing our departure to the field, Jay told us several times that bamboo sticks would be critical pieces of equipment while we worked on the ice and that they had to be in mint condition to offer the best resistance to wind. So we spent more than a day in Kulusuk fixing and reinforcing bamboo sticks, using wires and tape. And I am glad we did it!
Once we had collected all the data needed from a hole, we packed our equipment, removed the precious windbreak and the bamboo sticks, and either headed toward a new site few hundreds meters away, or went to the cook tent for diner. That’s how our busy days in the field went!
Tags: Arctic, drilling, glaciology, Greenland, ice core, NASA, polar, sea level rise


